

How Do Physical SIMs and eSIMs Differ? A Detailed Comparison in Japan
September 3, 2026
Quick Answer
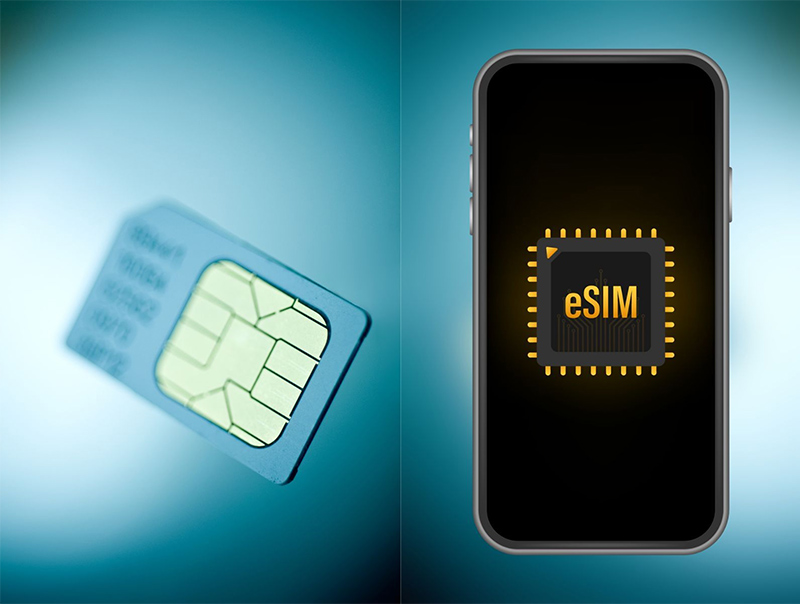
A physical SIM is a plastic card with a chip that you insert into your phone's SIM slot, while an eSIM is a chip already built into the device — you just scan a QR code to download the network profile and you're ready to go. In terms of signal quality, network speed, and pricing, the two types are no different because they run on the same carrier infrastructure. The real differences lie in: receiving time (eSIM can be used the same day, physical SIM requires shipping), device compatibility (not all phones support eSIM), and flexibility when switching devices (a physical SIM can be removed and inserted into another phone in 30 seconds, while eSIM requires a profile transfer process).
In short: newer phone + need network urgently → choose eSIM. Older phone, imported phone, or you switch phones frequently → choose physical SIM.
Who is this article for
This article is written for foreigners living, studying, and working in Japan, specifically:
- You've just arrived in Japan and are wondering whether to register a physical SIM or eSIM for the phone you brought from Vietnam.
- You're currently using a physical SIM and heard eSIM is more convenient, and want to know if you should switch.
- You're about to get a new phone and aren't sure which option will save you trouble later.
- You need network access urgently today — for example, going to the city office tomorrow, attending an interview, or your old SIM just got locked.
- You live in a remote area where shipping takes 2–3 days and want to know if eSIM can solve that problem.
- You're holding a SIM-locked phone or a used phone and don't know if it supports eSIM.
If you just want a one-line answer to "which one is better," the honest answer is: neither is absolutely better. They serve different situations, and this article will help you identify which situation applies to you.
Cases where this does NOT apply
This article is not suitable if you fall into the following situations:
- You're visiting Japan for a short trip (under 1 month) and don't have a residence card. This article covers long-term SIM/eSIM for residents with proper registration under their own name. Tourist SIMs are a different product line with a different process.
- You need a Japanese phone number for calls, opening a bank account, or signing contracts. The comparison below focuses on the technical differences between the two SIM types. Needing a number for calls determines the plan type, not whether to choose physical SIM or eSIM.
- You use a tablet, laptop, or device without a SIM slot. These devices usually have only one option, so no comparison is needed.
- You need to share network access among multiple people/devices at home. In that case, consider a monthly pocket WiFi instead of debating physical SIM vs eSIM.
- You want to keep your old phone number when switching carriers (MNP). The MNP process is a separate topic with its own paperwork and porting code, not covered in this article.
What are the differences between physical SIM and eSIM? Comparison table
This is the most searched section, so here's the table upfront for a quick overview.
| Criteria | Physical SIM | eSIM |
|---|---|---|
| Form | Plastic card with a chip, available in 3 sizes (Standard / Micro / Nano). Nano is nearly the only size used now. | Chip soldered into the device. You receive a QR code or activation code. |
| Delivery method | Shipped to your address (usually 1–3 business days depending on the area). | Received via email/message, usually within a few hours to the same day. |
| Installation method | Remove the SIM tray with a pin, insert the card, restart. Very simple. | Scan the QR code in Settings → download the network profile. Requires WiFi or existing network connection at setup. |
| Device requirements | Just needs a SIM slot and an unlocked device. | Device must support eSIM and be unlocked. Older phones usually don't support it. |
| Signal quality / speed | Same — uses the same carrier infrastructure. | Same — uses the same carrier infrastructure. |
| Switching to another device | Remove and insert into the new phone, done instantly. | Must delete the old device's profile and set up a new one, usually requiring a new QR code request. |
| Lost/broken phone | If you can retrieve the SIM card, insert it into another phone to keep using it. | Losing the phone means losing the profile too, requiring a reissue. |
| Risk of physical damage | Yes: bending, breaking, chip scratches, dropping during insertion/removal. | None, since there's nothing to drop. |
| Using 2 numbers at once | Requires a dual-SIM-slot phone. | Easier: 1 physical SIM + 1 eSIM on the same device. |
| Flying / short trips abroad | Remove and store it, insert the local SIM. | Turn on/off in Settings, no need to remove anything. |
| Best suited for | People who frequently change phones, older devices, secondhand phones. | People who need network urgently, newer devices, want to avoid shipping wait times. |
The three most important practical differences
1. Speed of getting connected. This is the biggest reason people choose eSIM. With a physical SIM, if you register today, the post office usually delivers it 1–3 days later. With eSIM, once your application is approved, you receive the QR code via email and can be connected the same day. If you've just landed at the airport, just moved, or your old SIM just expired, this difference matters a lot.
2. Flexibility when switching devices. This is where physical SIM wins. Phone breaks down suddenly? Pull out the SIM, borrow a friend's phone, insert it, you're connected. With eSIM, you have to contact the provider to request a new QR code, which can take a few hours to a full business day and sometimes involves a fee. People who frequently switch phones, borrow phones, or sell used phones should consider this carefully.
3. Compatibility. Many Vietnamese people in Japan use secondhand phones, phones brought from Vietnam, or devices from around 2017–2019. These phones often don't support eSIM. Registering for eSIM without checking first will waste time on reprocessing. See the section below for a 30-second check.
Steps to follow
Step 0: Check if your phone supports eSIM (30 seconds)
Do this before deciding, to avoid registering for the wrong type.
- On iPhone: go to Settings → General → About, scroll to the bottom. If you see an EID entry (a long string of numbers), your phone supports eSIM. No EID means no support.
- On Android: go to Settings → About Phone → Status (or the SIM info section), look for the EID line. Some phones let you dial *#06# to display the IMEI and EID.
- If your phone has an EID but was purchased in Vietnam or is locked to a foreign carrier, you still need to check whether it has been unlocked. A locked phone can't use either a physical SIM or an eSIM.
- Special note: some iPhone models sold in mainland China don't have eSIM even though they're the same generation.
Step 1: Identify your needs
- How soon do you need network access? Today/tomorrow → lean toward eSIM. Not needed until next week → physical SIM works fine too.
- Do you have a stable delivery address? If you're staying at a friend's place, temporary dorm, or haven't moved into your new place yet → eSIM is less hassle since you don't have to receive a package.
- Are you planning to switch phones in the next 6–12 months? Yes → physical SIM is more convenient.
- Do you need data only or a voice number? This is a separate question from physical/eSIM, but it affects which plan you choose.
Step 2: Choose a plan and register
- See all options on the products page.
- If choosing a physical data SIM: see monthly data SIM or 12-month prepaid SIM (pay once, no worrying about monthly payments).
- If choosing eSIM: see monthly eSIM.
- Fill in your information exactly as shown on your residence card (name in capital letters in the correct order, date of birth, nationality, card number, expiration date).
- Upload clear document photos, showing all 4 corners, no glare, no covered information.
Step 3: Setup after approval
If you choose physical SIM:
- Receive the SIM card by mail, check the size (usually Nano).
- Turn off the phone, use the SIM eject pin to open the tray, insert the card in the correct orientation (the cut corner matches the tray's cut corner).
- Turn on the phone and wait for it to detect signal.
- If you have signal but can't access the internet, go into APN settings and enter the parameters provided with the SIM. This is the step most people miss.
- Test by turning off WiFi and opening any website.
If you choose eSIM:
- Receive the QR code via email. Don't delete this email — many QR codes can only be used once.
- Connect your phone to WiFi (required, since you don't have mobile data yet).
- iPhone: Settings → Cellular → Add eSIM → Use QR Code. Android: Settings → Connections/Network → SIM → Add eSIM.
- Scan the QR code with the camera and wait for the profile to download (usually 1–3 minutes).
- Name the plan (e.g., "Japan Data") to distinguish it if you have multiple SIMs.
- Set this eSIM as your default mobile data line.
- Configure the APN if instructed, then turn off WiFi to test.
Documents needed
Important point: physical SIM and eSIM require exactly the same documents. Choosing one type doesn't make the process easier or harder. Under Japanese regulations, all telecom contracts with a phone number require identity verification.
- Residence card (在留カード / Zairyu Card) — photograph both front and back, must be valid. This is the mandatory and most important document.
- Passport — required for cross-checking in some cases.
- Current residential address — must match the back of the residence card. If you've recently moved but haven't updated your address at the city office, your application may be rejected.
- Email and contact number — especially important for eSIM since the QR code is sent via email. Double-check email spelling carefully, one wrong character means you won't receive the code.
- Payment method — credit card, bank transfer, or other options. See details on the support page.
Tip: photograph your documents during daytime, on a dark background, without flash. Blurry or glared photos are the top reason applications get returned, adding an extra day.
Costs
In principle, the monthly rate for physical SIM and eSIM with the same data amount is identical, since you're paying for data capacity and service, not the plastic card. Any cost differences usually come from add-on fees:
| Item | Physical SIM | eSIM |
|---|---|---|
| Monthly rate by data amount | Same | Same |
| Initial issuance/setup fee | Yes, depends on plan | Yes, depends on plan |
| Shipping fee | Yes (since the card must be mailed) | None |
| Reissue fee for lost/damaged | New SIM card reissue fee + shipping | QR code reissue fee (usually lower or free depending on case) |
| Device switching fee | Usually free (self-insertion) | May incur a profile reissue fee |
If you want to optimize long-term costs, the 12-month prepaid SIM plan usually has a lower per-month price than monthly plans, in exchange for a one-time payment. This plan suits people who've decided to stay in Japan for at least another year. But if your visa is about to expire, you're changing jobs soon, or you're unsure how long you'll stay, a monthly plan is more flexible.
Specific pricing for each plan is updated on the products page — check there instead of relying on word-of-mouth figures, since rates and promotions change over time.
Timeframes and processing time
How long until you're connected?
| Stage | Physical SIM | eSIM |
|---|---|---|
| Application approval | Usually within the business day | Usually within the business day |
| From approval to receipt | About 1–3 business days depending on area (Hokkaido, Okinawa, mountainous areas may take longer) | A few minutes to a few hours, via email |
| Setup time | 2–5 minutes (insert card + APN) | 3–10 minutes (scan QR + download profile + APN) |
| Fastest total time | Usually by the next day | Can be the same day |
Note about holidays: applications submitted Friday evening, weekends, or during long holidays like Golden Week, Obon, or New Year's will be processed more slowly. If you need network access urgently on Monday, submit your application by Thursday.
Validity period
- Monthly plans: renew each month, valid until you cancel.
- 12-month prepaid plans: valid for the full 12 months from activation date; renew or stop when it expires.
- Physical SIM card: the card itself doesn't have a "shelf life" in the usual sense, but the chip may degrade after years of repeated insertion/removal.
- eSIM profile: the QR code usually has an activation deadline (e.g., a few days to a few weeks after issuance). Once you receive the code, install it right away — don't forget about it.
- Related to visa status: when your residence card expires, your telecom contract may be affected. Remember to renew your residence card and update your information.
Where to submit and where to do it
You don't need to visit any government office to register a SIM or eSIM. This is a commercial service, not an administrative procedure. Common methods:
- Online registration — fastest and most popular. Fill out the form on the products page, upload your residence card photo, choose a payment method. Can be done at night or on weekends.
- Visit the store in Shin-Okubo, Tokyo — suitable if you want direct in-person support in Vietnamese, or if your phone has setup issues and you'd like staff to help.
- Ask beforehand via support channels — if you're not sure whether your phone supports eSIM, ask before registering. Contact info is on the support page.
For physical SIM, you need a reliable delivery address where someone can receive it. If you're working all day, use the post office's package holding service or choose an evening delivery slot. For eSIM, all you need is a phone with WiFi access — this is why eSIM suits newcomers who haven't settled into stable housing yet.
Common mistakes
Mistakes when using eSIM
- Scanning the QR code without WiFi. The phone needs internet to download the profile. No network means you can't set it up — but you don't have network yet. Find WiFi at home, a cafe, or a convenience store first.
- Accidentally deleting the eSIM. There's a "Delete eSIM" button in Settings. Tapping it by mistake means losing the profile and needing a reissue (which may cost money and take time). Don't fiddle with this menu.
- Factory resetting the phone and forgetting about eSIM. Restoring factory settings usually deletes the eSIM profile too. Before resetting, ask your provider how to preserve or reissue it.
- Reusing an old QR code. Most QR codes can only be activated once. Taking a screenshot to save it is fine, but scanning it a second time usually results in an error.
- Phone has an EID but is carrier-locked. A phone locked to a foreign carrier won't accept a Japanese eSIM. It must be unlocked first.
- Selecting the wrong data line. If your phone has dual SIMs, you must specify which SIM handles data, otherwise the phone routes incorrectly and you'll think the SIM is broken.
Mistakes when using physical SIM
- Not configuring APN. The most common mistake. The phone shows signal and carrier name, but can't access the internet. 90% of the time, the cause is not setting up the APN. Check the instructions included with the SIM or ask support.
- Inserting the SIM in the wrong orientation or not fully seated. The phone shows "No SIM." Remove and reinsert, paying attention to the cut corner.
- Breaking off the wrong SIM size. Damaging it means requesting a reissue, which costs money and takes days.
- Losing the SIM tray or dropping the card. Insert/remove the SIM on a flat surface, not on a train or outdoors.
- Delivery address doesn't match the residence card. This can delay application approval.
Common mistakes for both types
- Photographing the residence card without the back side. The back contains the address and important notes, which are required.
- Entering the name in the wrong order. The contract name must match the residence card exactly, or it needs to be redone.
- Thinking eSIM runs faster than physical SIM. Wrong. Speed is determined by signal, plan, and user density — not by SIM type.
- Forgetting to renew or pay. Getting disconnected and reactivating usually costs extra time and money.
Frequently Asked Questions
Does eSIM have weaker signal than physical SIM?
No. Both connect to the same carrier network of cell towers. If you experience weak signal, the cause is geographic location, being inside a thick concrete building, or your device — not the SIM type.
Can I switch from physical SIM to eSIM?
Yes, but this isn't something you can do yourself on the device. You need to contact the provider to request the switch, and a new profile issuance fee may apply. Ask in advance via the support page to learn the exact process and cost.
Does my phone support eSIM?
Quick check: go to Settings, find the device info section, and look for an EID entry. Having an EID means eSIM is supported. Generally, iPhone XR/XS and newer (except the mainland China version), Google Pixel 3 and newer, and recent Samsung Galaxy S/Note/Z models all support it. Phones from before 2018 usually don't.
Is switching phones a hassle with eSIM?
More of a hassle than physical SIM. You must delete the profile on the old phone and set up a new one on the new phone, usually requiring a new QR code request. If you frequently switch phones or use a fragile device, physical SIM will be less trouble.
What happens if I lose a phone that has eSIM?
You can't recover the eSIM profile from a lost phone. Notify the provider immediately to suspend the service and prevent unauthorized use, then request a new profile for your new phone. With physical SIM, if the phone is lost, the card is lost too, and the process is similar — so in this situation, the two types aren't very different.
Can I use a Vietnamese SIM and a Japanese SIM at the same time?
Yes, if the phone supports dual SIM. The most common approach is keeping the Vietnamese physical SIM in the tray and using the Japanese eSIM for data, or vice versa. Remember to select the correct SIM as your data line to avoid international roaming charges.
Is eSIM cheaper than physical SIM?
Rates by data amount are usually the same. eSIM saves on shipping fees and waiting time, but this is a small amount. Don't choose eSIM just because you think it's cheaper — choose it because it fits your situation.
I need a Japanese phone number to open a bank account, which type should I choose?
What matters isn't physical vs eSIM, but that you need a plan with a voice number, not a data-only plan.
What if I don't have an eSIM-compatible phone and also don't want to deal with inserting a SIM?
You can use a monthly pocket WiFi — no need to touch your phone, just turn it on and use it, and it can be shared across multiple devices. In exchange, you'll need to carry an extra device and remember to charge it.
References
- Apple — Guide on eSIM and how to check EID on iPhone (support.apple.com)
- Google — Pixel support page on eSIM setup (support.google.com)
- Samsung — Support documentation on eSIM for Galaxy series (samsung.com)
- GSMA — Technical documentation on eSIM standards (Remote SIM Provisioning)
- Ministry of Internal Affairs and Communications of Japan (総務省) — Regulations on identity verification when signing mobile telecom contracts in Japan
- Current plan information and service terms from HD TELECOM at the products page
Note: eSIM compatibility varies by device generation and sales market. Before registering, you should check the EID on your device yourself or ask the provider to be sure.
Source verification date
The content of this article was last checked and updated on June 10, 2025. The list of eSIM-compatible devices, pricing, and delivery times may change over time — please verify on the products page or ask directly via the support page before registering.
What should you choose next?
To summarize in two lines:
- Need network urgently, have a newer phone, not yet settled into housing → monthly eSIM.
- Older phone, secondhand phone, frequently switching phones → monthly data SIM, or 12-month prepaid SIM if you're staying in Japan long-term and want a better per-month rate.
If after reading you're still not sure whether your phone supports eSIM, just message HD TELECOM with your phone model — our Vietnamese-speaking support team will check for you before you pay anything. Contact information and payment instructions are on the support page. You can also visit our store in Shin-Okubo, Tokyo in person to have your phone checked on the spot.
Want to read more guides on life and procedures in Japan? Check out our blog page.
Related products
Find your plan with HD TELECOM
SIM, eSIM and Pocket WiFi — genuine quality, clear pricing, 24/7 support.
What's the Difference Between Data SIM and Voice SIM? Detailed Comparison 2025
Which SIM Should International Students Use in Japan? Complete A-Z Guide
Should You Choose SIM, eSIM, or Pocket WiFi When Coming to Japan? A Detailed Comparison
Is 100GB/month enough? How to calculate your own data usage while living in Japan