
How Should Newcomers to Japan Prepare a SIM, WiFi, and Phone Number?
September 3, 2026
Quick Answer
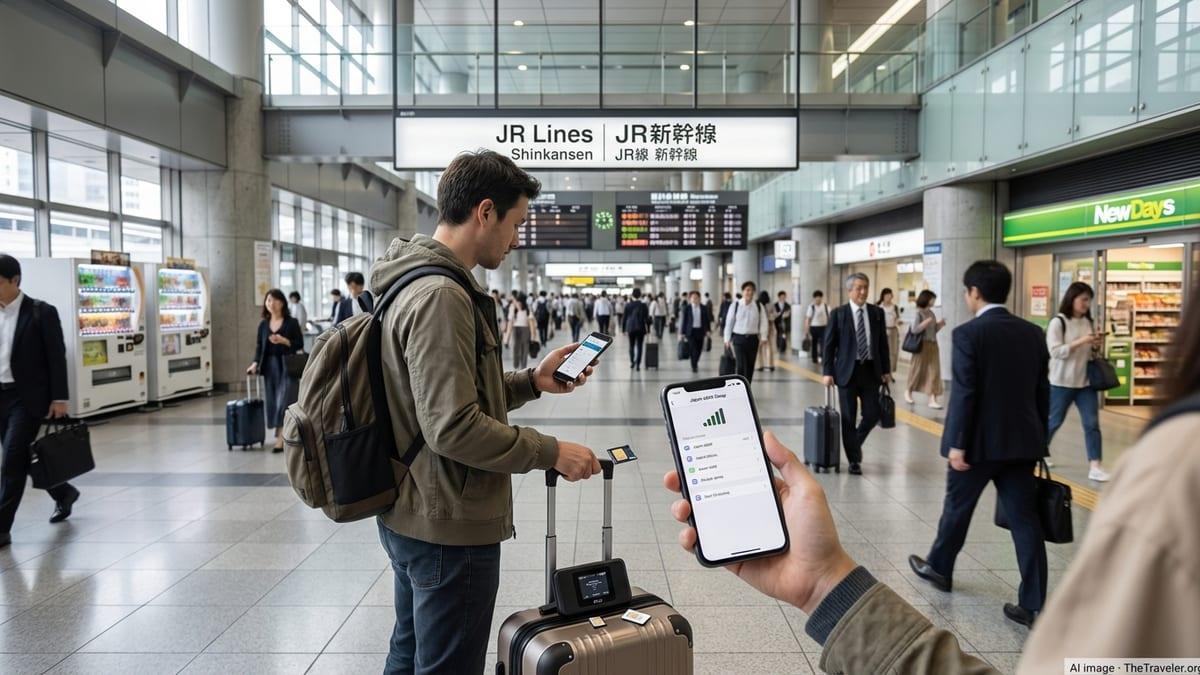
Newcomers to Japan should prepare in two steps: get internet from day one (an eSIM purchased before flying, or a data SIM / pocket WiFi received at the airport or shipped to your Japan address), then within the first 1–4 weeks, sign up for a Japanese phone number starting with 080/090/070 to open a bank account, apply for part-time jobs, and sign housing contracts.
If you only need internet for LINE, Google Maps, studying, and working, a data SIM or eSIM is enough and the cheapest option. If your whole household or multiple devices need connectivity, pocket WiFi makes more sense. A voice number should be registered after you have your Residence Card (在留カード) in hand, since this document is legally required to verify your identity.
Who This Article Is For
This article is for people who have just arrived or are about to arrive in Japan for the first time, specifically:
- International students starting in April or October, living in dormitories or rented apartments.
- Technical intern trainees or specified skilled workers (tokutei ginou) who just entered the country, usually picked up from the airport by their company and taken to a dormitory.
- People coming under an engineer visa, company employee visa, or family visa.
- People who have been in Japan for a few weeks but still don't have their own phone number, currently relying on dormitory WiFi or a soon-to-expire tourist SIM.
This article assumes you have a Residence Card (or are about to receive one) and have an address in Japan to receive deliveries. If you don't have an address yet, section 4 has a separate solution.
Cases Where This Does NOT Apply
You don't need to keep reading if you fall into these categories:
- Traveling or on a short business trip under 90 days, without a Residence Card: you only need a daily-rate eSIM or tourist SIM, and you cannot and don't need to register a Japanese voice number.
- Your company or school has already provided a phone and SIM: check with them first before buying anything extra, to avoid paying twice.
- You already have a contract with docomo, au, or SoftBank and are satisfied: switching to a budget carrier is a different topic (MNP number-porting), not covered in this article.
- You need fixed-line internet for an entire apartment, 4K streaming, or heavy online gaming: in that case, look into fiber optic (hikari) home installation — pocket WiFi is only a temporary solution or for people who move around a lot.
- Your phone is still SIM-locked from your home country: you must unlock it first, otherwise the Japanese SIM won't work.
Steps to Follow
Phase 1 — Before Flying (Done in Vietnam)
- Check whether your phone is unlocked. Phones bought on installment plans through carriers in Vietnam are sometimes locked. Ask your current carrier to unlock it, or try inserting a SIM from a different carrier to test.
- Check if your phone supports eSIM. For iPhone: go to Settings → General → About, and look for a line saying "Digital IMEI / eSIM". For Android, check Settings → Connections → SIM Manager. iPhone XS and later, along with most high-end Android phones from 2020 onward, support eSIM.
- Check 4G/5G band compatibility. Phones used in Japan should support Band 1, 3, 18/26, 19, and 41. Phones purchased in the US or Europe may have weak signal in rural areas of Japan.
- Pre-order an eSIM or data SIM. This is the most important step: you'll need internet the moment you land to call whoever is picking you up, check train routes, and message home. With a monthly eSIM, you'll receive a QR code by email and scan it before flying — once you arrive, just turn it on and you're connected.
- Save important information offline: your dormitory address in Japanese, the phone number of whoever is picking you up, a pre-downloaded map, and photos of your passport and enrollment documents.
Phase 2 — Arrival Day at the Airport and First Week
- Receive your Residence Card at the airport. If you enter through Narita, Haneda, Kansai, Chubu, New Chitose, Hiroshima, or Fukuoka, the Residence Card is usually issued right at the immigration counter. At other airports, your passport will be stamped and the card will be mailed to your address after you register your residence.
- Activate your pre-installed eSIM, or insert your received data SIM. If you haven't prepared anything, use the free airport WiFi for temporary communication, but don't rely on public WiFi for more than a day or two.
- Register your residential address at the ward/city office within 14 days. This is a legal deadline. After this step, you'll have an official address printed on the back of your Residence Card — many telecom and banking services require this address to match your registered address.
- Finalize your long-term connectivity plan. By this stage, you'll know whether your dormitory has WiFi, how much you travel, and how many GB you use per month. Based on that, choose a monthly data SIM, a 12-month prepaid SIM, or pocket WiFi.
Phase 3 — Registering a Japanese Phone Number (Week 2 to Week 4)
- Determine whether you actually need a voice number. You need one if you plan to open a bank account, apply for a part-time job, sign a rental contract, register for a point card, or receive calls from a hospital or school. You don't need it right away if you're only studying and communicating via LINE for the first 1–2 months.
- Prepare your documents: a valid Residence Card (ideally with more than 3 months remaining), passport, registered address, email, and payment method.
- Submit your application. Fill in your information with your chosen carrier, upload photos of both sides of your Residence Card, and wait for identity verification.
- Receive and activate your SIM. Insert the SIM, configure the APN according to the included instructions, and make a test call to check.
- Record your phone number and use it consistently everywhere: banking, job applications, school records, housing contracts, and delivery apps. Frequently changing your number is a common reason people miss mail or job interview calls.
Should You Choose a Data SIM, eSIM, Voice SIM, or WiFi?
| Type | Best for | Has 080/090 number? | Advantages | Limitations |
|---|---|---|---|---|
| Data eSIM | People with eSIM-compatible phones who want internet right after landing | No | Received via email, no waiting for shipping, no need for a Japan address | Doesn't work on older phones; must reinstall when changing devices |
| Physical data SIM | Students and workers using a single device who need stable, low-cost data | No | Cheap, simple, works on any phone | Must wait to receive the SIM by mail |
| Voice SIM | People who need to open a bank account, apply for jobs, or sign contracts | Yes | Official Japanese number accepted everywhere | Requires identity verification, higher fees than data SIM |
| Pocket WiFi | Families, roommates, heavy laptop users | No | Shared across multiple devices, nothing to insert into your phone | Must carry an extra device, needs charging |
The most common combination for newly arrived Vietnamese: a low-cost data SIM for data + a voice SIM for a Japanese number, or using a dual-SIM phone with both inserted. See data SIM, eSIM, and pocket WiFi options on the product list page.
Documents to Prepare
Under Japanese regulations, registering for phone service with calling capability requires identity verification (本人確認). So prepare the following:
- Residence Card (在留カード) — clear photos of both front and back, still valid. This is the primary document.
- Passport — used for cross-checking, especially if the name on your card differs from the name on the application.
- Japan address — must match the address printed on the back of your Residence Card. If you've just arrived and haven't registered yet, you may be able to use your dormitory address along with a confirmation letter from your school or company (depending on the service).
- Email and a contact method — to receive activation information and invoices.
- Payment method — credit card, debit card, bank transfer, or convenience store payment, depending on the service. See payment details on the support page.
- Student ID or enrollment certificate — not mandatory, but good to have ready if you're a newly arrived international student.
For data-only SIMs (no calling), document requirements are usually much lighter — some services only need basic information and a delivery address. For data eSIMs, you can even purchase them while still in Vietnam.
Costs
The figures below are approximate market prices for reference for newcomers, excluding tax, and may vary by plan. Check the exact price on the product page.
| Item | Approximate Cost | Notes |
|---|---|---|
| Monthly data SIM (3–20GB) | about 1,000–3,500 yen/month | More GB costs more; 10–20GB is enough for most students |
| 12-month prepaid data SIM | one-time payment, works out cheaper than monthly | Suitable for those staying in Japan for over 1 year |
| Monthly eSIM | similar to data SIM | No shipping fee |
| Voice SIM | about 1,000–3,000 yen/month + call charges | Calls typically cost about 22 yen per 30 seconds if no call plan is purchased |
| Pocket WiFi | about 3,000–5,000 yen/month | Large data allowance, can share with 5–10 devices |
| Initial fees (registration, SIM, shipping) | about 0–3,300 yen | Many promotions waive this fee |
| Tourist SIM bought at the airport | about 3,000–7,000 yen for 7–30 days | Only suitable for temporary use; very costly for long-term use |
Money-saving tip: don't buy a long-term tourist SIM at the airport just for convenience. A 30-day tourist SIM can cost 2–3 times more than a monthly data SIM meant for residents. The optimal approach is to buy a short-term eSIM or pre-order a data SIM, then commit to a long-term plan once you have your Residence Card and address.
Deadlines / Processing Time
- eSIM: you typically receive the QR code within a few minutes to a few hours after completing the order and payment. This is the fastest way to get connected.
- Physical data SIM: about 1–3 business days for domestic shipping within Japan, depending on the region. Remote areas like Hokkaido and Okinawa may take longer.
- Voice SIM: requires additional time for identity verification, usually 1–3 business days from when the application is complete and the Residence Card photos are clear. Blurry photos, missing back-side images, or incorrect addresses are the top reason applications get rejected.
- Pocket WiFi: 1–3 business days to receive the device.
- Legal deadline to remember: register your residential address at the city office within 14 days of having a place to live; you must also report within 14 days when you move.
- Residence Card expiry and SIM contracts: many services tie contract duration to your Residence Card's validity period. When you renew your residence status, you should update your carrier with your new card information, or the service may be suspended.
Where to Apply / Where to Go
Registering for SIM, eSIM, WiFi
With HD TELECOM, you can do everything entirely online: choose a plan on the product page, fill in your information, upload document photos, and select a payment method. If you're in Tokyo and want direct support in Vietnamese, you can visit our office in Shin-Okubo, Tokyo — a very convenient area for Vietnamese people, close to many Vietnamese shops and supermarkets.
Related Administrative Procedures
- Registering your residential address, applying for a Certificate of Residence (juminhyo): at the 住民課 counter of your local ward/city office.
- Opening a bank account: at a branch near you or at Japan Post Bank. Most require a reachable Japanese phone number.
- Receiving your mailed SIM: at your dormitory, rental apartment, or pick it up at the post office if you're out at school/work all day. Enable delivery notifications so your package isn't returned.
Common Mistakes
- Waiting until you arrive at the airport to look for a SIM. Lines at airport counters get very long during peak seasons (March–April and September–October), and prices are higher. Preparing an eSIM in advance is the most efficient approach.
- Not unlocking your phone before flying. Discovering your phone is SIM-locked only after arriving in Japan means contacting back home, resulting in a week without internet.
- Relying only on dormitory or convenience store WiFi. You won't receive calls from your school, dispatch company, or delivery drivers — and you might miss part-time job interview opportunities altogether.
- Using a 050 number (app-based IP number) for official paperwork. Many banks, landlords, and companies don't accept 050 numbers. To be safe, use an 080/090/070 number from a voice SIM.
- Registering when your Residence Card is close to expiring. Applications are easily rejected or approved only until the card's expiry date.
- Address on the application differs from the one on the back of your Residence Card. This is the most common cause of delays. Register your residence at the city office first, then fill out the application.
- Letting someone else use a SIM registered under your name, or buying a SIM registered under a stranger's name. Improperly transferring a phone number is a violation under Japanese law, and if that number is used for fraud, the registered person will face trouble. Always register under your own name.
- Choosing a plan with too much GB and not using it all. During your first month, track your actual usage under Settings → Mobile Data before committing to a long-term plan.
- Forgetting to cancel your contract when returning home or moving. Fees will keep being charged, or you may accumulate debt that makes future registration difficult.
- Not saving your contract information. Take photos of your contract number, phone number, registration email, and support contact information, and keep them in a dedicated album on your phone.
Frequently Asked Questions
Can I buy a SIM right after arriving in Japan even without a Residence Card yet?
Yes, data SIMs or data eSIMs are usually purchasable since they don't require the strict identity verification that voice SIMs do. However, a voice number (080/090/070) almost always requires a Residence Card.
Do I absolutely need a Japanese phone number?
If you plan to stay in Japan for more than a few months, yes. A Japanese number is nearly mandatory for opening a bank account, applying for part-time jobs, signing rental contracts, registering for payment apps, and receiving contact from schools or hospitals.
Should I use a data SIM or pocket WiFi?
For a single person with one phone on a tight budget, choose a data SIM. If multiple people are living together, using laptops heavily, or frequently switching devices, choose pocket WiFi. You can also use a data SIM on your phone and enable hotspot sharing for your laptop, if the plan allows it.
Is eSIM hard to set up?
No. You just scan the QR code received via email, name your eSIM, and set it as your data line. The key thing to check beforehand is whether your phone supports eSIM and is unlocked before purchasing.
How many GB per month is enough?
If you mainly use LINE, maps, and social media, and have WiFi at home: 3–10GB is usually enough. If you watch videos, make daily video calls back to Vietnam, and don't have WiFi at home: choose 20GB or more, or go with pocket WiFi.
Can I register without a Japanese credit card?
Yes. Many services for foreign residents accept bank transfers or other payment methods. See available payment options on the support page.
If I want to switch carriers later, can I keep my old number?
Usually yes, through the number portability (MNP) process. You'll need to request a portability code from your current carrier and provide it to the new one. Conditions and fees vary by carrier, so ask before signing a contract.
What should I do with my SIM if I go home temporarily for a few months?
If you plan to return and want to keep your number, ask your carrier about temporarily suspending service. If you're leaving for good, properly cancel your contract and confirm all fees are paid, so future registration won't be blocked.
References
- Ministry of Internal Affairs and Communications of Japan (総務省 / MIC) — regulations on identity verification for mobile phone contracts under the Act on Prevention of Unauthorized Use of Mobile Phones (携帯電話不正利用防止法).
- Immigration Services Agency of Japan (出入国在留管理庁) — guidance on the Residence Card (在留カード), address change reporting obligations, and airport card issuance.
- Ward/city offices (市区町村役場) — procedures for residence registration within 14 days and issuance of the Certificate of Residence (住民票).
Note: regulations, fees, and document requirements may change over time and vary by carrier and locality. For matters related to the Residence Card, residence status, residential registration, or opening a bank account, you should verify directly with your local city office, the Immigration Services Agency, or the relevant bank before proceeding. This article is intended as reference guidance and does not replace advice from the relevant authorities.
Source Verification Date
The information in this article was cross-checked against official sources on June 1, 2025. We review this content periodically; if you notice information that has changed, please let us know so we can update it.
What Do You Need for Your First Week in Japan?
If you're about to fly and want internet the moment you land, a monthly eSIM is the fastest option — receive the QR code by email with no shipping wait.
If you're already in Japan and want a stable, low-cost data plan for the whole school year, check out our monthly data SIM or 12-month prepaid SIM. If you live with friends or use a laptop a lot, look at pocket WiFi.
Not sure what to choose? Just message HD TELECOM — our Vietnamese-speaking support team in Shin-Okubo will ask a few questions about your needs and suggest the most cost-effective option. You can also read more guides on our blog.
Related products
Find your plan with HD TELECOM
SIM, eSIM and Pocket WiFi — genuine quality, clear pricing, 24/7 support.